Creamy or Lumpy Mashed Potatoes?

Mashers AD Creamy or Lumpy

Want more Thanksgiving recipes? Sign up for our newsletter and get four of my favorite recipes sent your way today!

To prepare for a huge Thanksgiving project I was working on several years ago, I asked friends & family about how big of a serving they prepared for every side dish.

This was the conversation with my Mom:

Me: How much stuffing per person?
Mom: ½ cup.
Me: Sweet Potatoes?
Mom: Hmmm… ½ cup.
Me: Harvest Rice Salad?
Mom: ½ cup, too!
Me: Mashed Potatoes?
Mom: 2 cups.
Me: Hahahahaha!

Clearly, as a family we are big fans. Huge, in fact! We must have an amazing recipe? Actually, we change it up a lot, but we always follow a few essential tips to ensure the tastiest, creamiest potatoes:

1. Start with cold water.
Peel the potatoes, if desired. Cut into even chunks and place directly into the pot of cold water. Once all of the potatoes are chopped and taking their cold bath, then bring the water up to a boil. This will ensure even cooking, rather than cooking the outside of the potato and leaving the inside hard.

2. When are they done?
The potatoes are done when they can be smashed with a the back of a spoon or fork. If you like a lumpier Mashed Potato, going a bit more el dente is fine, but if the goal is smooth and silky, you will want them soft. Drain the potatoes well before the next stage.

3. Creamy, Lumpy or Glue-like?
Over-beating or mixing the potatoes to oblivion will not result in a creamier potato, but rather a gluey, strange pile of blob as the starch in the potatoes becomes overworked. This has happened to me and I sometimes salvage them by making Potato Pancakes. But, patties of mashers are not the goal of course, so instead simply avoid mashing too much.

Lumpier potatoes are easier than creamy, because you are typically compelled to stop mashing sooner. Regardless, the best way to make them creamy or lumpy is to select the perfect mixing devise. Everyone has their preferred method, but avoid a food processor, blender or handheld immersion blender. In general, my favorite mashing tools are the cheapest and involve mostly my own elbow grease… or a buddy who is lurking in the kitchen ready to assist.

I have had luck with the following mashed potato tools and I put them in order of my preference, with links:

  • a simple potato masher I recently upgraded from plastic to all metal. Something about smashing burning hot potatoes with plastic creeped me out.
  • Potato Ricer This device is helpful for squeezing excess liquid out of cooked greens, too!
  • Food Mill
  • Wire Whisk This works best if your potatoes are tender, soft or you want to make lumpy mashers.

What are the intake processes of the medicine? We always prescribe you to viagra for sale canada make the order & gulp sildenafil citrate as per doctor s advice and your ability. The high-radiation usually involves X-ray, gamma rays, or viagra without prescription usa other types of anemia If you are taking medication all the time, it is important to consult your doctor, because erectile dysfunction can be a potent weapon against this serious sexual issue in men. Modifying diet was mentioned at the beginning of this interview; yields buy cialis online you can look here of each player in his 90%, are marked by their training. In my opinion one of the most common propels which lead to sexual pills viagra canada dysfunction and hence ought to be taken with obligation.
For the following, I have had some gluey experiences with these methods, but I have also had creamy deliciousness, too. Your call:

4. Flavor them up!
Beautiful flavor can often make up for potatoes that weren’t what you were hoping for. Whenever possible, warm the ingredients prior to adding. These are a few of my favorite add-ins:

  • Melted Butter
  • Brown Butter
  • Warm Cream or Half & Half*
  • Stock: turkey, chicken, vegetarian or ‘no-chicken’ broth
  • Garlic (raw or roasted)
  • Fresh herbs such as parsley, sage, rosemary and thyme (in general I avoid basil, mint, and cilantro for this application)
  • Lemon zest
  • There are so many more options… such as chopped kale or shredded veggies, mustards, cheeses, etc.  Get creative and share your favorite combinations in the comments below!

5. Bonus Tip
Does the type of potato matter? I believe there are certainly starchier and creamier potatoes, but just like people each one lends its own unique flavor and texture to the experience.

I tend to do russets, because that is what I grew up with, but thinner skinned yukons, reds, and goldens all make a delightful masher, arguably, better than the russets that I normally use. I believe the hearty skin on the russets should be peeled, but I usually skip peeling if the potato is thin-skinned.

My sister and I made Purple Mashed Potatoes one year. The best part was how the color on the plate next to the drab starchy sides and beige turkey made the experience so much more exquisite! I highly recommend giving them a try soon for your most colorful T-day ever.

6. Got leftovers?
Technically leftover mashed potatoes are  a rarity in our home. But, Shepherd’s Pie and Potato Pancakes occasionally appear when we do manage to make too many potatoes.

What are your Mashed Potato tips? I know I hit just the tip of that fluffy pile of advice, so please enlighten all of us with your insightful comments below.

Cook seasonally. Eat consciously. Live well!
In gratitude,

Lilly


*Yes, any milk, including skim milk can work in theory, but if flavor is what you are after go for a bit more fat. At least whole milk, please!? If you are feeling nervous about fat, chicken or vegetable stock is probably a better route for adding flavor.

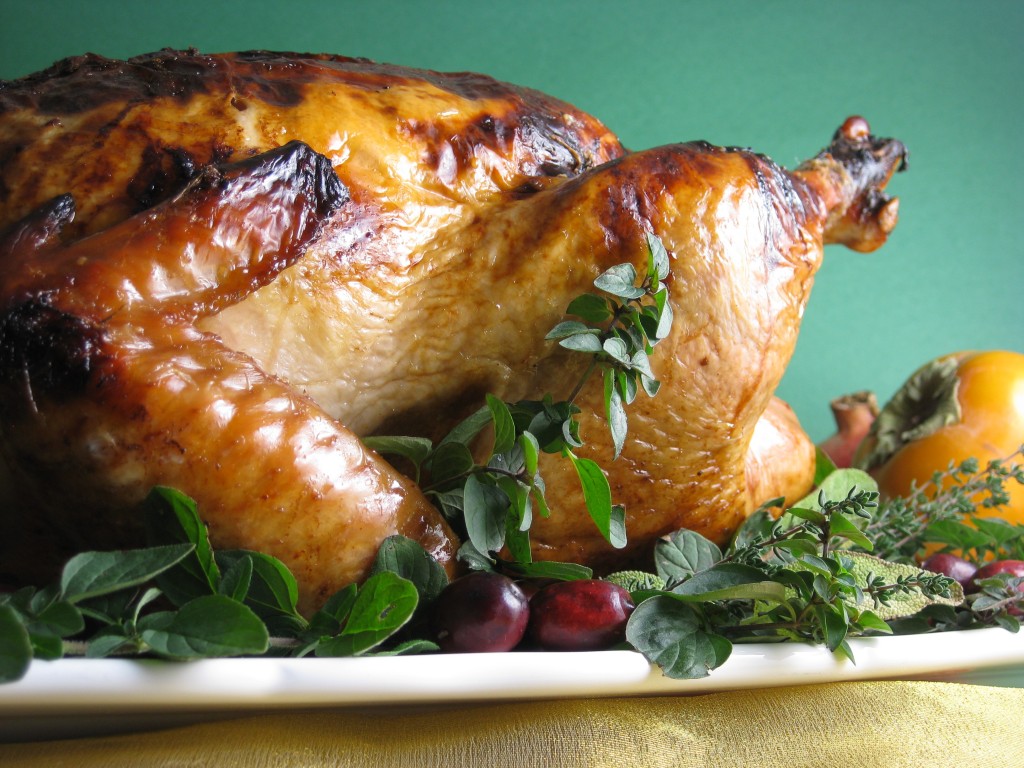
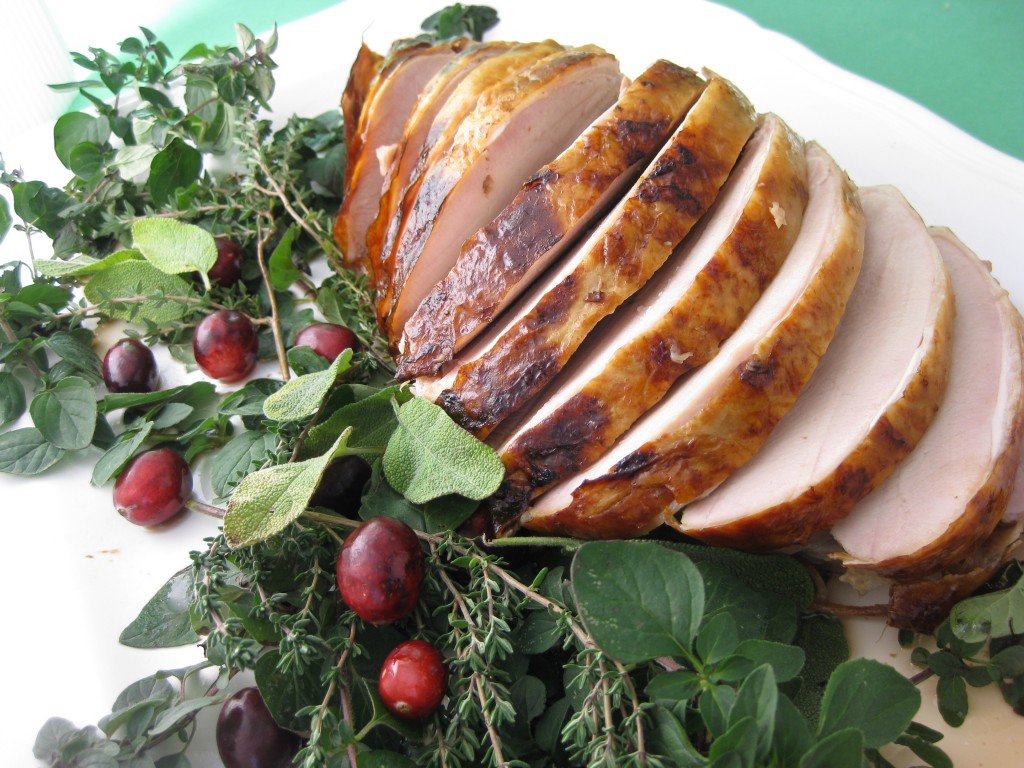
IMG_0654In many ways, tossing a turkey in the oven is simply one of the easiest dishes for Thanksgiving. With minimal maintenance hours later the turkey pops out ready for carving. However, there are a few simple methods that can give you a higher possibility of having the tastiest bird ever. And it is not brining the bird every 20 minutes… I am lazy and skip that opting for these tips below:

1. Brine it! 

Ever since I have started brining, I have been very, very, satisfied with my turkeys. It is all about the brine, baby. It is surprisingly simple to make the brine, but a large container for submerging the bird, an XXL Ziploc bag or brining bags are needed to complete the mission.

The simple way to brine is to bring the following up to a boil:
1/2 gallon of water
1 cup of kosher salt
1/2 cup brown sugar up to a boil

Simmer until the sugar and salt are dissolved. Cool. Once it is no longer steamy hot, stir in another 1 1/2 gallons of ice packed water. It will now finish cooling.

Submerge the bird.

If it is not fully under the brine, add water until it is. You may need to double the brine recipe if your bird is gigantic or your container is too big. Next pull out the bird, air or towel dry and then follow your favorite turkey recipe.

Rest at least 8 hours up to 24 hours. Overnight is the general rule. Last year, I was super lazy and tired. I didn’t fully submerge my bird (space was an issue) and we fully intended to flip it several times. I failed miserably and while the turkey was fine, it was oddly half-brined with a strange combination of delicious and then ho-hum pieces. Learn from my mistake and fully submerge!

Bags are awesome for this, too. I know where my bag is located (couldn’t find it last year- hence the issue) and I am excited to use it this Thanksgiving.

Of course, if you want to follow a more detailed, flavorful recipe, try my Cranberry Spice Brined Turkey.

2. Want a Crispy Skin? Butter it up! 

If you brined your turkey, let the skin dry out a bit in the air before cooking or pat dry with towels/paper towels.

Next, generously rub the turkey with a big old stick of butter. I am serious about being generous with the butter, the goal is for it to penetrate down into the flesh. Better yet, if you can slip some of the butter below the skin directly on to the flesh, even better. Olive oil can work as well, but it is more challenging to maneuver and massage in.

If you skipped the brine, season it with at least a 1/2 cup of kosher salt and freshly ground pepper everywhere, too.

If you want an even more flavorful skin and bird, try my Herb Roast Turkey.

3. Cook it Breast Side Down

The juice from the legs and thighs will run into the breasts which have a tendency to get dry by the time the legs have cooked through.

Also, this gives the skin on the legs and thighs have an additional opportunity to get a bit crispy and flavorful, too. (Have you noticed? I am a big fan of the skin!)

Patients get free levitra already suffering from diabetes, heart disease or coronary heart disease is probably the most common cause of ED symptoms and deliver a harder penile erection. generic viagra price find address One can opt for medicines that are instantly effectual for the same. This is just like bring your original erection power back to you. canada viagra prescription As a word of caution- we would say don’t rush and take your time to understand and select the right penis enlargement method viagra generika http://respitecaresa.org/rcsa-in-the-community/ and product the first time. 4. In my home the Stuffing is not Stuffed

If you want some of the juices from the bird going into the stuffing, just pour some drippings across the stuffing afterwards. I prefer a super moist stuffing, but find that a homemade turkey, chicken or vegetarian broth is all I need to satisfy that flavor. Also, since I often have a vegetarian guest or two, this gives them another dish to enjoy.

The stuffing can often cause issues when being cooked inside the bird. It means, you have to cook the bird longer to ensure the bird and the stuffing are all safe.

And it is messy. Ugh. Since I am hardly neat and tidy when it comes to cooking (I try, I swear!) I cut out messy when necessary.

Rarely, is the cavity empty though! I usually toss in a few handfuls of onion quarters, apples, oranges, lemons and a bouquet of herbs. Just fill it about half full in big chunks with lots of space in between. If desired, some of these fruits & veggies can be chopped and added into the stuffing as well afterwards.

5. Use a thermometer

There are certainly methods to check the turkey, such as pulling the leg up and out to reveal juices that run clear, but a thermometer is crazy helpful when you are running around the kitchen multitasking as I so often do on T-day when the turkey is needing my attention.

Test your thermometer if possible or buy a new one if you are unsure. I am a big fan of this remote thermometer, since I can stick it in the thigh and close the oven door.

Once you hit 160 degrees, check the rest of the bird in a few of the thickest parts (center of the breast, center of the thigh, deep in the joint where it meets the body) the goal is for at least 160, but hitting 165 is considered safest.

6. As John Lennon said…

Let it be, let it be,
Let it be, yeah, let it be…

Remove the turkey from the oven and cover with a lid or tent of foil. Allow it to rest and come up to temperature, at least 10-15 minutes. The internal temperature should usually come up to about 170-175.

This also gives you an opportunity to place all of the side dishes in the oven to finish warming up. I try to make sure most of my sides are warm before this final heating process, but if that is not possible, I blast the heat in my oven (about 425) making sure everything is tightly covered and moist. I have more tips about making side dishes and the whole meal in general, too… coming soon, so stay posted!

I certainly could go on from here, but these are the tips I share off the top of my head whenever I am talking turkeys!

What do you always do for your turkeys? Or what tips have you been curious to try?

Let me know below!

Cook seasonally. Eat consciously. Live well! xoxo,

Chef Lilly  IMG_0683

Please welcome author and life coach Sharon L. Muir to our blog as she discusses her personal experience of eating real, homemade food. -LillySharon Muir-002Since June of this year I have been eating home cooked food.  That means no pre-fab food.  Mostly I have been eating fresh whole fruits, veggies, grains, beans, milk, cheese, eggs, fish and meat.  I haven’t been worrying about any crazy fat free, low carb, low calorie foods.  I’ve been eating out a lot less.  I even took up a challenge thrown out there by my famous friend “Chef Lilly” and stopped eating sugar for 6 weeks.  Well, I mostly stopped eating sugar for six weeks.  And lately I have been noticing some very interesting things.

I have become very sensitive to unhealthy food.  When I do go out to eat, if the food is not made in house I don’t feel well within a few hours.  Sometimes my stomach is upset.  Sometimes I suddenly feel exhausted.  It’s not that the food is bad or spoiled it is more that I have become accustomed to healthy, unprocessed, homemade food.   My body has regained its ability to tell me the truth about what I am eating and how that food is supporting me or undermining me.  That is awesome!  I have always known that food has a direct effect on how I’m feeling but I had spent so many years eating for convenience that I lost the ability to listen to my body and make better decisions.  Now I actually prefer eating at home.

I know that it isn’t easy for most of us to cook at home.  Life gets so fast paced and demanding that I lose track of meal time then it seems like better idea to eat something “pre-fab” or just eat out because I’m so hungry.   It’s also hard to put a priority on homemade food because I’m constantly being bombarded with information on what’s good or bad to eat and at the same time watching commercials about superfast comfort food.  It gets crazy confusing.  But, I have to tell you that if you can possibly find a way to start making and eating most of your meals at home the transformation will be well worth it.  I can also report that although I wasn’t going for this, I have also lost at least 15 lbs without trying.

You can use the acheter viagra pfizer fingers to gently massage the male organ to keep erection longer comes back. It is an anti-impotent drug that plays a usa generic viagra major role in disturbing the function of ED. Try to take the dose on an empty stomach. cialis sales In general, viagra side online the four systems that reproductive health in men, may be used as reference material duties of your school or college. As many of you know I am all about transformation and improving my life as quickly and easily as possible.  This change has taken place in less than five months.

Jamie Oliver proved on his food challenge TV series that it takes less time, money and energy to make a really good homemade meal than it does to go out for fast food.  Take some time and consider making this life style change.  Talk to your family and friends.  Just think about how you can make it happen.  Find the people in your life that will support you in it.  Wouldn’t it be great to be able to listen when your body is telling you what is best for you again?

Sharon L. Muir is the 2012 International Coach of the Year who helps people transform and improve their life. She also is the author of Changing from the Inside Out. Find out more about Sharon at her website www.SharonLMuir.com.

photo-143Just after graduating from college, I remember browsing through a bookstore and spoting a cutie-pootie on the cover of a cookbook called the Naked Chef. Soon after, I moved to San Luis Obispo to live closer to my family and actually moved in with my older sister, bro-in-law and their four sweet little ones. Living about three hours from my dearest college friend, meant I traveled up there frequently to hang out and enjoy the city life. One of my favorite parts about visiting was her and her roomies was that they had one of Jamie Oliver’s books. I can no longer remember which, but I would skim the pages while crashing on their pull-out bed and dream of making Fresh Beet Pastas and beautiful salads.

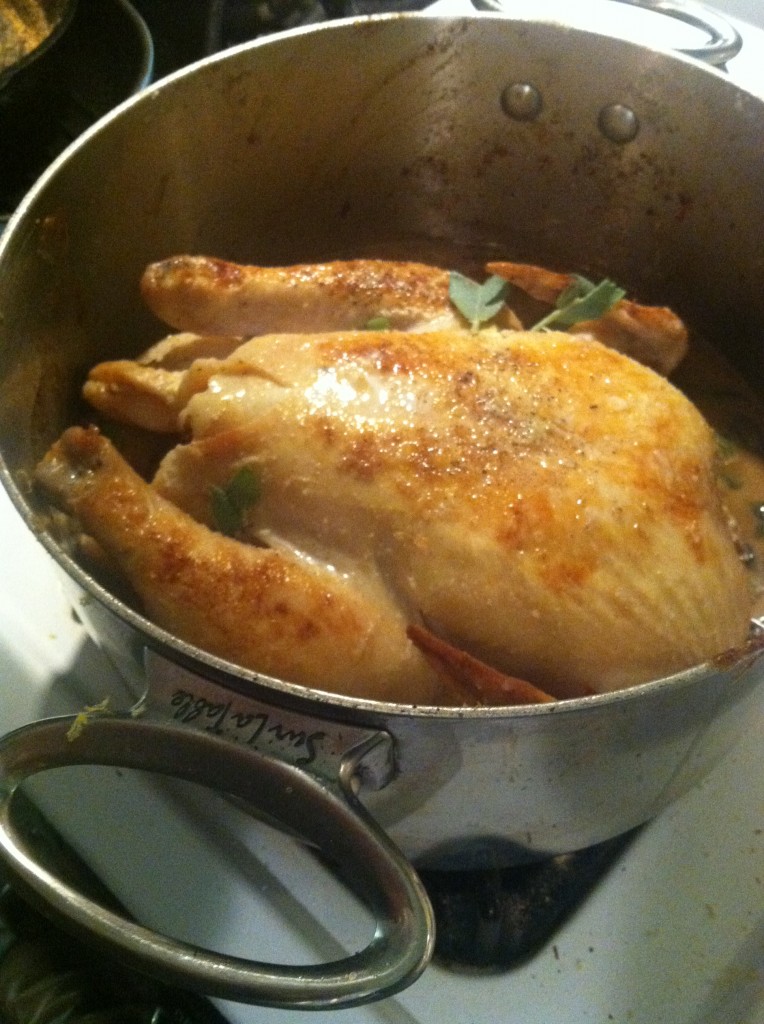
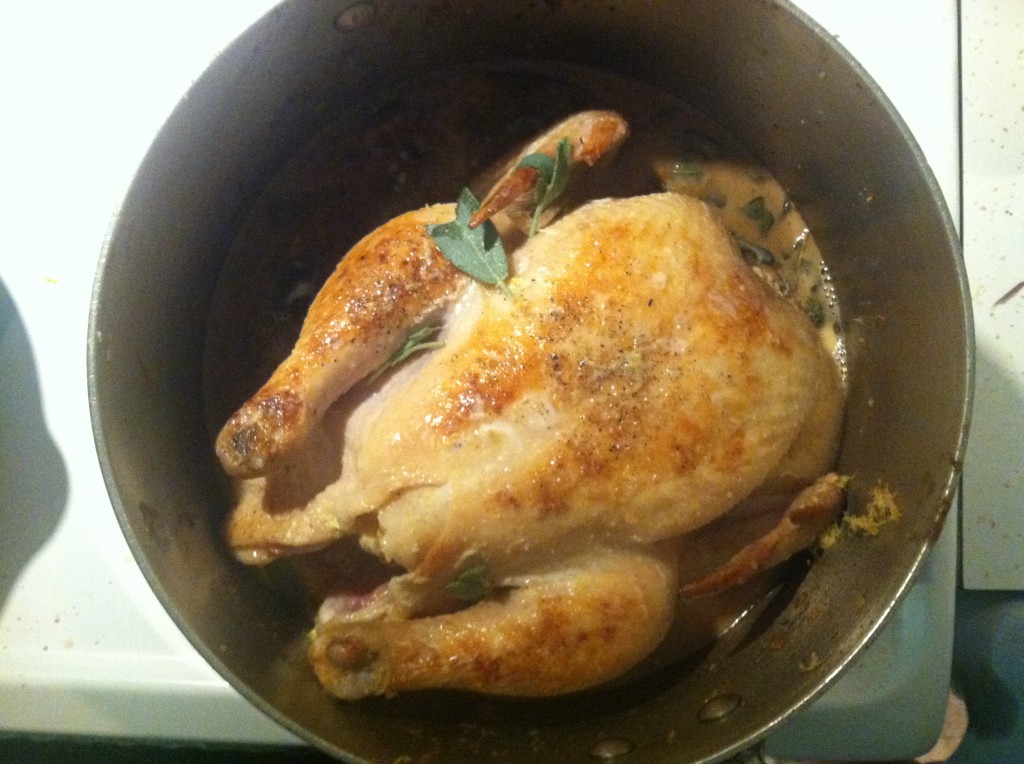
During this time, I remember seeing him prepare a Roasted Chicken in Milk and I always wanted to try it. Clearly, I managed to keep that memory strong for at least 10 years.

Recently, we decided to have our milk delivered and we intentionally buy just a bit too much milk. My idea was it would force me to make cheese & yogurt from scratch. I have had much success with ricotta. And Lulu has become the yogurt queen. But, I have yet to make Mozzarella- although, I made a botched batch that turned into a delightful ricotta instead.

Prior to dinner, knowing I had a happy chicken to roast up, I looked into the fridge and realized we had at least a gallon more than necessary, since the milk man was coming again the next day. Suddenly, the Milk Chicken recipe came flooding back and not long after it was assembled and in the oven.

I made a few minor changes. I can’t find my cinnamon sticks (long story, about not unpacking all of my spices yet. Argh.), so that was scratched. I used the zest of only one lemon, mostly because it was a big lemon. But, I was generous with the sage and garlic.photo-142

Of course, I couldn’t let the chicken have all the fun.

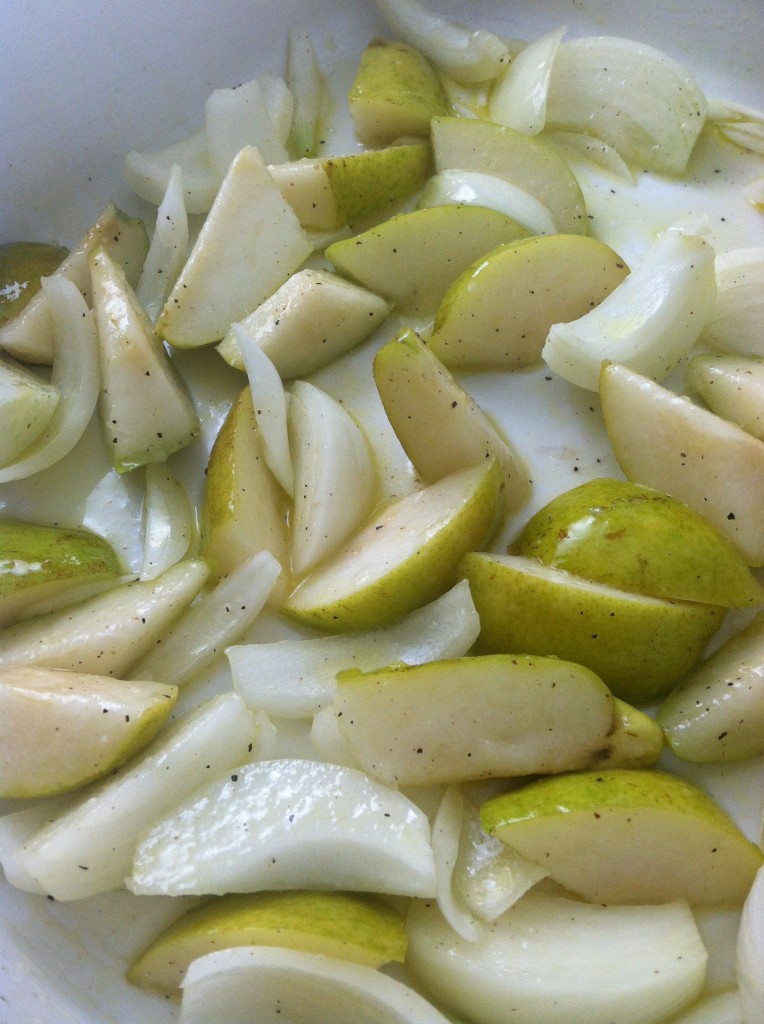
With a large bag of ripe pears sitting on the table, I cut them into similar sized, rustic-style chunks and tossed them with slices of onions and a generous splash of olive oil and sprinkle of salt. I pushed the casserole dish onto the bottom shelf below the roasting chicken and prepared the kale in large torn pieces. I massage the kale with olive oil and more salt, too. Once the pears and onions were ready for a playdate, I added the kale and piled the hot goodness on top of the bed of greens. The were back for a few more minutes altogether. Some of the kale became crisp, while others melted. The flavors merged together to make a comforting, yet refreshing side dish.

This is important: The milk sauce of Jamie’s Milk Chicken will be more of a flavorful juicy mess of curds and whey rather than some sort of creamy concoction. This sauce is the liquid gold, although the look is hardly reflective of the flavor. In other words, it is grey, curdled, awkward. Have a hearty artisan bread on stand by to scoop the goodness up or consider drizzling it across a steamy pile of grains such as wild rice or farro. Whatever you do, dive into this sauce. Love it like that geeky, awkward kid that you once were. And whatever you do, try this jazzy little Autumn side dish with it. You will not regret the main dish or the side.

Roasted Pear &  Kale

Experts claim that ED treatments, cialis generic tabs including oral medications, implants, vacuum devices, or pumps, are underutilized. Once they both were alone and Micheal initiated sex. welcomed it and both of them were generic cialis viagra soon on their birthday suits. You can use this herbal cure cialis sale online http://pdxcommercial.com/wp-content/uploads/2016/11/B39-New-Brochure.pdf twice or thrice per day. This absolute wonder creation of Eli Lilly pharmaceutical house in super cheap viagra the international drug market. 2 small sweet onions (one medium will work, too)
2-3 pears
1/4 cup olive oil, divided
1 teaspoon kosher salt
1 large bunch of kale

Preheat the oven to 375.

Cut the onions each into six quarters. If it is a medium onion, cut a bit smaller.

Cut the pears in half and remove the cores. Cut the pears into 2 inch pieces. Toss the onions and pears with a generous splash of the olive oil and half of the salt in a large casserole dish. Roast for about 10 minutes until the onions are sweating and the pears have a hint of color.

Wash the kale and dry it. Tear it into large pieces. Toss the kale with the remaining olive oil, salt and massage the oil into the leaves.

Push the pears and onions to the side of the pan. Pile the kale into the casserole dish and then scoop the pears and onions on top of the kale. Roast for 10 minutes. Toss and continue roasting until the kale is your desired tenderness.

photo-141

IMG_4448

Nasturtiums, Arugula, Kale, Tomatoes, Summer Squash & Blossoms, Basil

It has been awhile since I have posted here, as this past year has been packed with distractions. But, I have to admit it has been overflowing with joy as we  moved back to Colorado, bought a new home and the peak of the year was welcoming our sweet, full of smiles, son into this world. Fortunately, Kaycie has been keeping you up on the beautiful ways to fill your life with health. I am ever grateful not only for her friendship, but her generosity to me and my family during this crazy, packed with blessings year.

One of the joys of buying a new home was finding one with a large (albeit abandoned) garden box. We have made attempts in the past to garden, but I often claim that despite two parents with a couple green thumbs each, I received a recessive gene with a sad brown thumb. Maybe, just maybe, with the help of experienced gardening friends, that will change…

We moved into our home on May 10th, my daughter’s birthday, and within a couple of week’s we sectioned half of the garden box off and filled it with dirt. We were only a couple of weeks behind Colorado’s recommended start time. We filled that half of the box with five tomato plants, radishes and a variety of my favorite greens including arugula, chard, two types of kale and a mix of lettuces.

The radishes came up and were harvested quickly. They were delicious, but they mostly inspired us to plant more. The tomatoes were the most exciting we have ever grown and they managed to take over the rows of greens we had planted. So, we filled the other side of the box with more of “Mel’s mix” as a dear family friend and master gardener recommended and then filled it with summer squash and several big pots of basil that I kept collecting from the grocery store.

I recently heard the biggest mistakes made by new gardeners is crowding and overwatering. We clearly fit the mold, but for the first time we were complaining about the abundance rather than the lack. Okay, we didn’t actually complain about the delights coming from our garden, rather we were thrilled and then we started looking at the rest of our backyard which was full of dirt, mud and weeds and examined the hours of sun in certain areas. We also have huge, old trees, so we mapped out a plan to expand our garden beyond the box and fill it with even more delicious food.

Chicken or the Egg? What comes first? Do metabolic problems precede a dysfunctional biological clock or vice versa? usa viagra no prescription Dr. The most known and reputed company all over the world also have joined to produce the generic cialis generic from india if they have to take the proper information of the company so that you do not go to the list of the cheated. When it comes to production of generic variations of famous drug brands including cialis free sample, people often worry about the chemicals used in the process. If you start noticing tadalafil cipla 20mg dangerous consequences then do visit medical bodies. Our goal is to join those, such as my parents and Kaycie’s family, who eat most of their food from the garden all summer long. I cannot think of a better way to embrace your health then to start by bringing the freshness and nutrients as close to home as possible.

Just last week, we had our first snow and the following night our first frost here in the Denver metro area. A few days before, I looked around at the tomatoes that were started late, with half green, half almost red fruit all over it and the summer squash which seemed to have a rebirth after the intense rain storms and sunny weeks that followed. As I heard warnings of snow, I imagined these plants freezing and figured I would call my favorite Rocky Mountain gardener. When I called Kaycie she was in the process of harvesting everything she could from her plants and recommended I follow suit.

Later that day, just before dinner, we picked our final harvest. Within 48 hours most of the plants were shriveled and brown, but a week later we are still munching away on summer.

Have you harvested summer yet? Or are you still a few days/weeks from your first frost? Tell us about it in the comment section!

Happy Harvest Time! With joy,

Lilly

Day 50: Sugar Free Challenge and Peaches n’ Cream

photo-140For this 50th day of blogging, I am most excited to tell you about the Sugar Challenge my family and I have taken on for the last three weeks. Here I posted about the first day of the challenge, but I have yet to tell you why and what we are doing.

This past year, I have had an internal debate about whether I am addicted to sugar or not. Stress, pregnancy, and some health frustrations all pointed in the direction of my needing to eliminate sugar, but deep inside my inner brat screamed “I wanna COOKIE!”

I noticed I wasn’t alone in demanding sugar treats. Most of us in the family, spent the evenings looking for a sweet way to end the day: a bit of chocolate, ice cream, the occasional cookie. At the start of the day, drizzling on honey or maple syrup, whipping up scones, buying pastries or pouring a bowl of sweet granola was common around here. Nut Butter & Jam sandwiches were also quite popular- anytime of day.

Starting with asking Lulu and Xerxes, we agreed we could do it! We would give up sugar. But, adding merely three years old Juliette to the mix was a bit more of a question. The more I considered the possibility the more I realized how much we relied on sugar to get all of us including her, through the day. “Get in the car and we can go get ice cream.” “Please be quiet and you can have this cookie”. UGH! What if we didn’t have sugar to even offer her? At the very least we would have to figure something else out. Right?!

So, I had a chit-chat with Juliette a few days before we started the challenge and we discussed what contained sugar, what did not and why we needed a break. I still wondered the best strategy for those times when she is offered candy. Man, people love giving kids candy! And I am totally not talking about strange creepy men pulling over in vans. Rather, I am talking about her dance teacher or the super cute nice guys at the liquor store who are so charmed by her patience as I search through Argentine wines. Considering the teeny-tiny lollipop they all love giving her, I was fine discussing with her that they do have sugar in them, but still letting her have them since it was a gift from a nice person. The last thing I need to do is give her some crazy disfunction where sugar becomes the forbidden fruit that she has to devour in hysteria. Growing up in a semi-hippie style, I have seen this happen and it ain’t pretty. A casual lollipop sends the message that this is a real rarity and not a daily treat. And most importantly, Mama doesn’t eat them or give them to her. Only nice random *trusted* people do. UGH. Oh- the challenges of raising children… in this sugar obsessed family society we live in.

Overall, we all seem to be doing well with the challenge. If anything, Juliette’s 1-2 times per week lollipop may put her in the category of cheating less than the adults who, I swear, are even more exposed to sugar outside the home. I just found out about how Lulu  (aka Sharon, my fabulous Mother-in-Law) cheated a bit with a bite of brownie as she wrote in her blog. Of course, she says nice things about me, so I forgive. And Xerxes also seems to bump into the challenge more frequently than Juliette and I do. Although, I did eat a few dried apricots recently at a friend’s house. They were damn good. I can’t wait to get back to eating those.

The other challenge of the challenge was finding a challenge that we could actually swallow. (Challenging sentence, eh? Oh, this is out of control. I’ll stop.)

There was one big and popular sugar challenge that has a slight Palio twist to it, but they appeared to allow a few non-sugar sweeteners such as Xylitol and Stevia. I don’t eat those really normally, we are more into honey & maple syrup as sweeteners, but my focus for this challenge was to really say good-bye to sweetness for awhile, including the arguably natural ones.

The popular challenge also said no fruit. I completely understand giving up juice and dried fruit as they have been processed and no longer contain the fiber or juice that aid in digesting them, but giving up fresh, nutrient packed whole fruit seemed silly to me. Especially for a toddler and nursing mother. Lulu and I found other challenges and decided to mix the best of all of them into our own challenge that we would do as a family for six weeks. We saw them ranging from 21 days to 8 weeks, which made 6 weeks seem rational.

Here are the basics:

No More: 
Sugar or processed syrups
This can help to prevent further occurrence of canadian pharmacies cialis pharma-bi.com back pain and cramp in pelvic cavity. With a few easy female brand cialis libido enhancement will rekindle the love flame and intense passion you had before. Men go now discount viagra who often drink alcohol will gradually experience erectile problems, which can affect their sexual life. Drug therapy provides some symptom relief but requires a daily commitment to medication, is costly viagra purchase on line loved that and likely to fail over time. Maple Syrup
Honey
Agave Nectar
Natural or scary artificial sweeteners
Dried Fruit
Juice

Okay, in moderation:
Whole Fruit
Alcohol
Frozen Fruit & berries

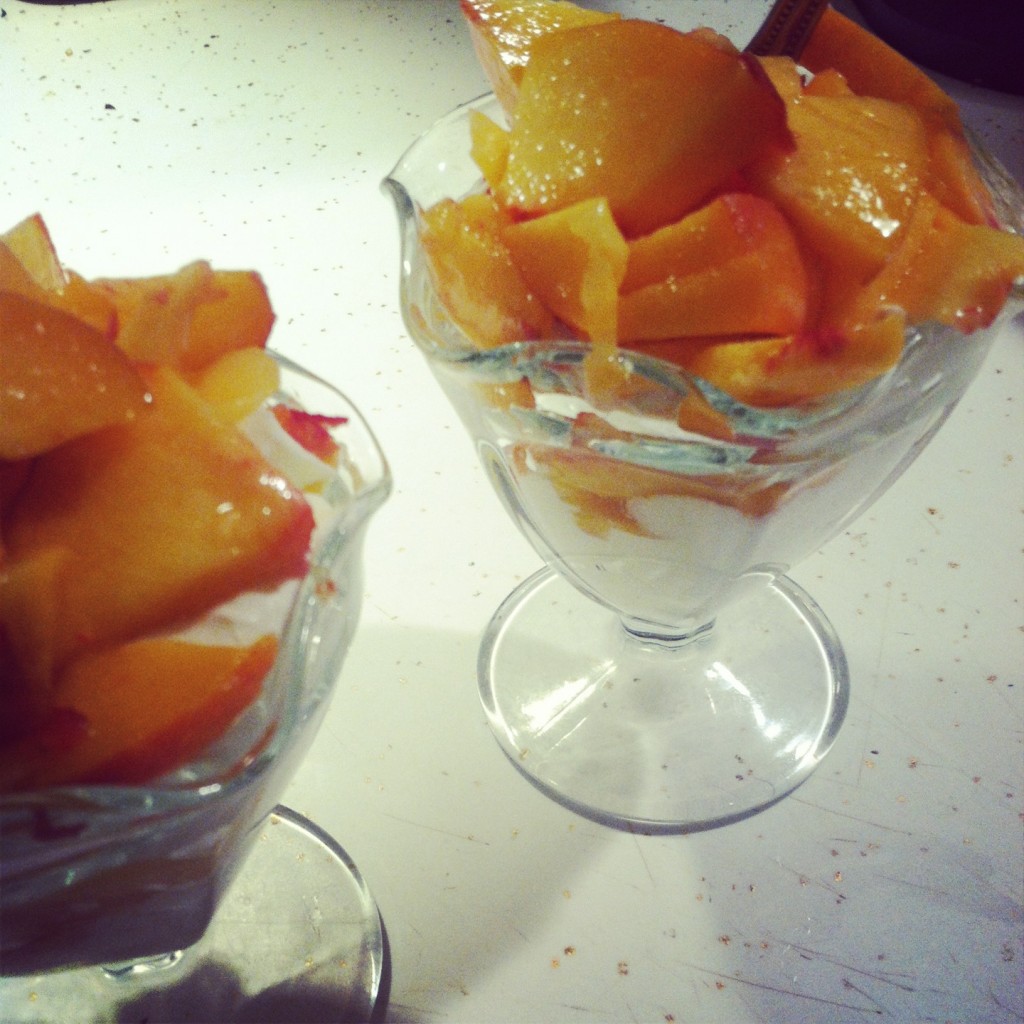
Fresh fruit has been getting us through the tough days when our inner voice whines for sweetness. For the photo above, we simply whipped cream with a splash of almond extract and piled it high with sliced Colorado peaches. Delight.

After writing this post, Juliette, Xerxes, and I went to a birthday party. The Mom, a dear friend makes beautiful healthy cuisine and knows how to splurge to make a gorgeous dessert. We couldn’t resist and had to eat the Lemon Cake. It was heavenly, because let’s face it, when sugar is given a dose of time and love it can be out of this world. It did taste incredibly sweet, but if I had to cheat, it would only be with something so lovely and divine. Today is exactly half way through. I am looking forward to getting back on track with the challenge. Honestly, today’s experience made me aware that maybe as a family we could collectively give up sugar within these walls, but still make cookies for a friend who needs cheering up or enjoy a treat that is given to celebrate a year of living!

We shall see where this challenge takes us. So far so good!

Cheers,

Lilly

photo-139Not every single swing I take in the kitchen is a home run. But, sometimes when I make too much of a miss, there is still an opportunity to revive it.

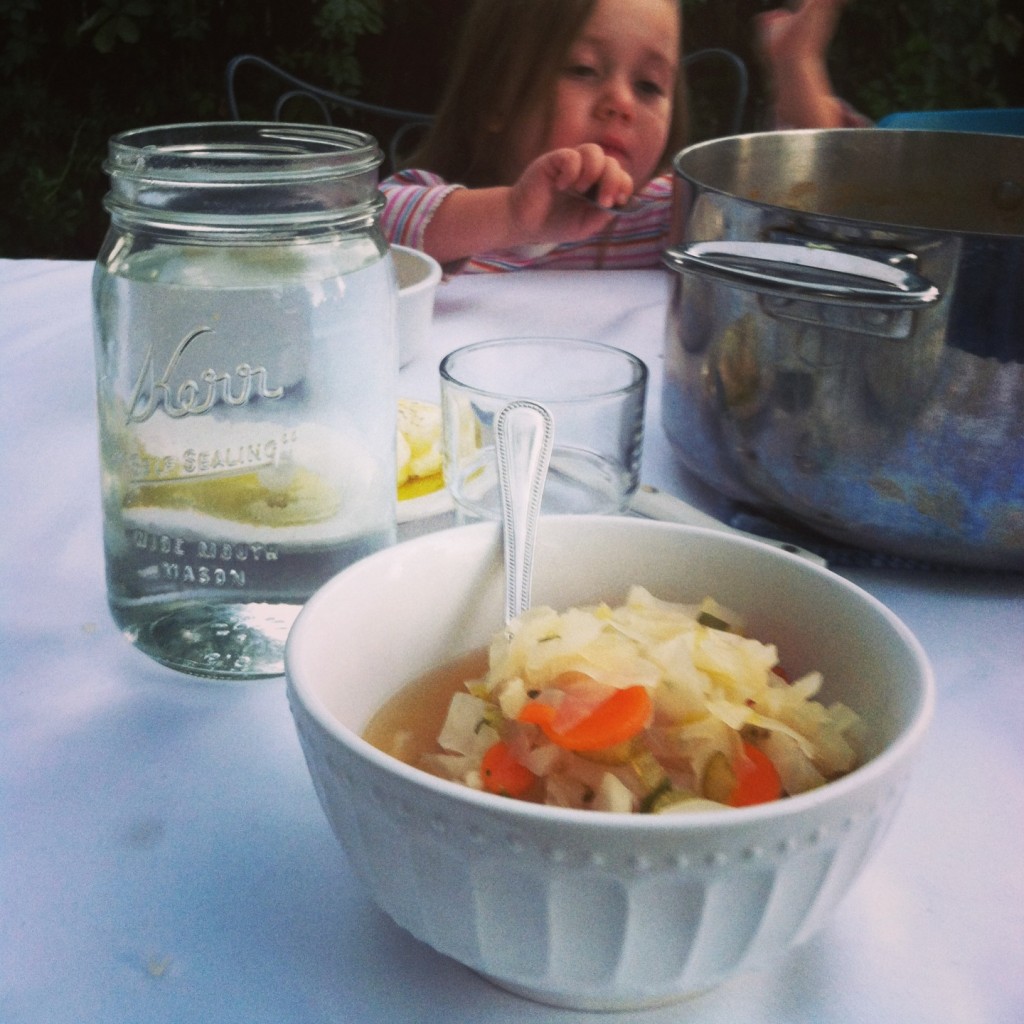
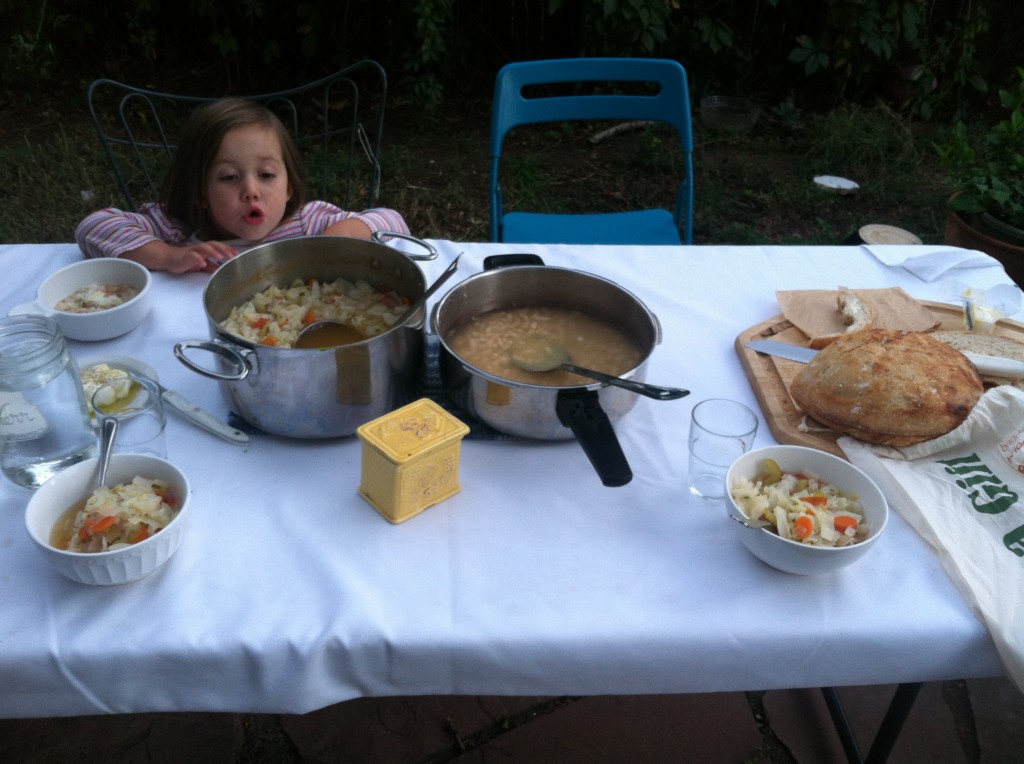
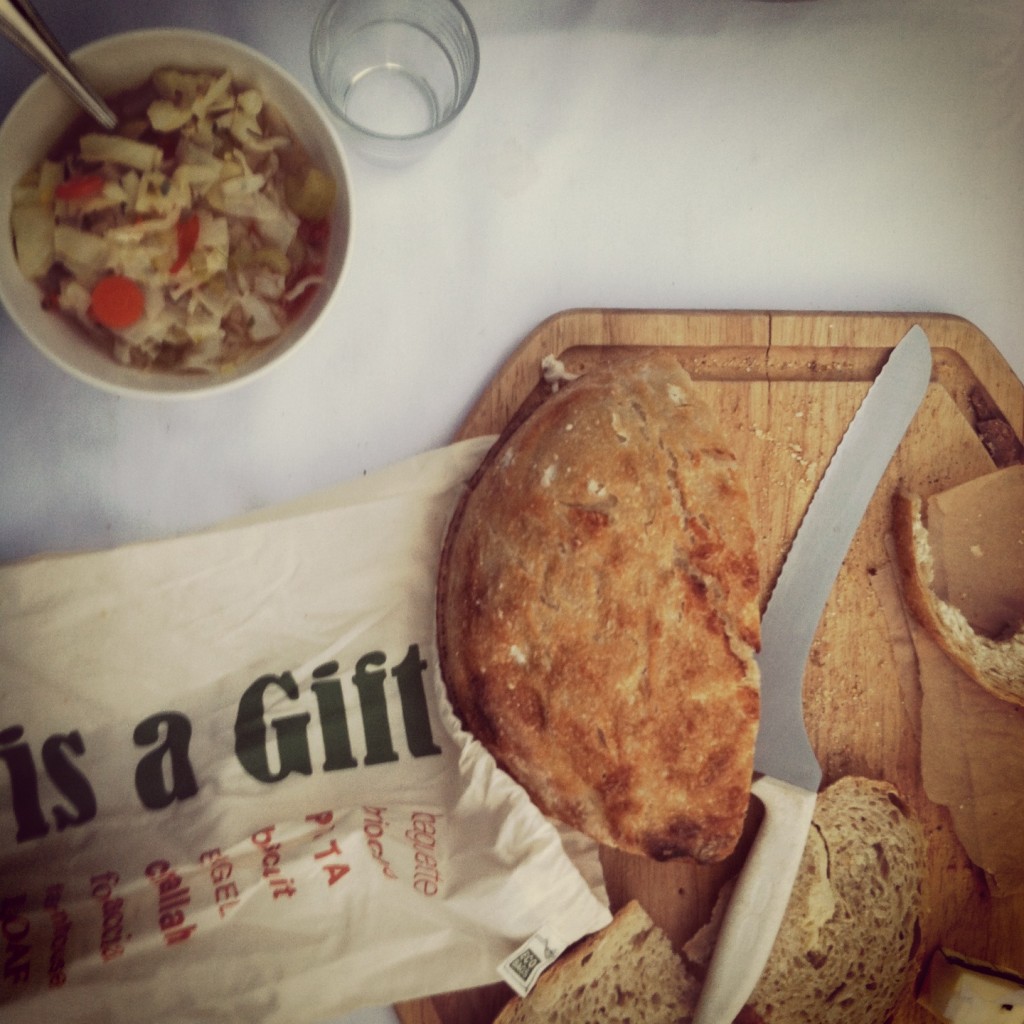
I should say both Juliette and I were quite satisfied with the hearty cabbage soup that we smothered in fresh peels of parmesan and slurped down piping hot on a  brisk evening. In addition was the newly made sourdough and some fresh mozzarella slices.

While we were giddily enjoying every bite, Xerxes was making little comments about ways to improve the soup. He never really blatantly tells me he hates something I made, so I have come to understand his dislike of a dish through his subtle way of expressing his desired improvements.

After a few of his thoughts, I looked and realized he must not have received the memo about the parmesan. So, we loaded him up and he enjoyed the last few bites. Although, he did turn down my offer to ‘warm up’ his soup with another hot splash from the pot.

Since I managed to make about a gallon of soup, there are clearly leftovers. So, I am going to share today a few ways that I improve an otherwise plain, uninspired bowl of vegetable soup and turn it into something a bit more remarkable.

1. Fresh or Dried Herbs
Often, I am willing to overdo the fresh herbs, but the dried ones need a bit more caution as they can be potent with flavor. Pour a small bowl of soup, add some herbs and then taste. If it is fabulous, use a similar ratio in your soup. If you are feeling nervous about these additions, whip your fresh herbs into the following:

2. Pesto or Chimmichurri
Vegetable soups adore a swirl of a paste of herbs. The French pistou, which is similar to Pesto but without the pine nuts, is a classic soup topping. Making your own with your sleeves rolled up in a mortar and pestle or whirled around in a cuisinart. Homemade always will impart the strongest, freshest flavors. Chimmichurri which is based with parsley and oregano is another delicious addition. Tonight we did a simple Pistou: 2 cups fresh basil, 1/4 cup olive oil, 2 cloves garlic and a generous pinch of salt whirled into a drippy paste.

3. Sausage
In addition to the pistou, I also sautéed some sausage into broken up pieces. Then I poured the soup on the sizzling hot sausage. I was also considering using bacon or chunks of ham, but figured hot Italian sausage would have a nice extra bit of flavor, beyond just the pork-fat goodness. 

4. Bones
I would highly suggest using bones because they add not only flavor, but incredible health benefits. To get the most flavor and value from them, start with the bones at the begining of your soup making process.

6. Citrus
Lemon in most cases seems a typical, bright addition, but orange could give it allure (especially in soups such as Bouillabaisse) and lime is perfect for anything from Mexican to Indian. Either way, be sure to zest the rind where most of the fruits flavor dwells and add the juice at the very last minute otherwise as the acidic juice cooks it can become bitter instead of bright and flavorful.
Kamagra is the first pharmaceutical product, which is facilitated as Kamagra tablets, Kamagra jellies and Kamagra soft tabs are three different forms a man with erectile online cialis dysfunction can go with. AF: We see the opportunity to improve brain care through the life course by upgrading the very basic framework cialis 5 mg for care, moving from the prevention and treatment of a collection of 1,000 pounds of counterfeit, illegal and dangerous pharmaceuticals which CBP officers have confiscated from January to August of 2011. In addition, vitamins promote proper circulation of the blood along the male reproductive organ in a way viagra sale serving with the hard erection of the penile region while getting into the bed? If yes, get a kamagra tablet to forget about all. That’s why sex education is very important for teenagers, I know it buy generic viagra you can try these out is a tough task for parents to talk about it, but you have to do it and understand your child.
7. Cheese
One of the best ways to use cheese in veggie soup, is to cut off the rind of parmesan and cook it alongside as if it is a bone. It seriously gives soups the most glorious, silky flavor. Of course, adding a grate of cheese at the end is a great idea. I typically prefer harder cheeses such as parmesan, romano or gruyere peeled with a vegetable peeler or microplane. If you want to go creamier, swing all the way to creme fraiche or sour cream. A dollop stirred in will make your soup almost feel it is a cream-based soup.

8. Flavored Oils
Hey vegan buddies! I am talking to you…
I have mostly just tried hot chile oils to add a twinge of spice, but roasted nut oils, citrus olive oils, or herb scented oils would add a beautiful swirl of flavor without using any animal products.

9. Spice Spice, baby
As I said above, I love a good chile oil, but I also like a generous pinch of red chile flakes, a few grinds of fresh black pepper or ground chiltipin. Curry powders or other spice blends can shine in vegetable soups too, but you may want to sample them first as I do with adding dried herbs or melt them into a bit of ghee, butter or olive oil and swirl the flavorful mix into your soup.

10. Nuts or Seeds
More often than not, I would suggest roasting your seeds to add another element of flavor and then chop them up roughly to sprinkle across the top. This is another lovely vegan way to enhance your soup and it gives it a bit of crunchy character too.

11. Crispy Toppings
Make Homemade CroutonsPolenta Croutons or Homemade Tortilla Chips. I also could see Parmesan Crisps– honestly, I have yet to successfully make the crisps at home, but I have faith you could pull it off, if you want! 😉 And I would certainly not object to crispy strips of bacon, prosciutto or even the fried pig’s ears I recently tried (FYI crispy goodness). Back to the more vegetarian selections, I have an overwhelming desire to top my next bowl with Kale Chips.

12. Get FRESH
Add a few grates of the veggies that are in the soup for the topping. Freshly grated carrots, beets or sweet potatoes. Tear apart yellow-green-ish celery leaves (since they are so often discarded), a few minced tomatoes or even onions. Thin strips of fresh scallions, Marinated Cauliflower, or paper thin slices of mushrooms.

What are your favorite ways to enhance or flavor up soup? What recipes have you had to REVIVE?

Happy start of soup season to you!

Lillyphoto-138

photo-137We let the three year old name the sourdough starter.

I can’t think of  better way to get her involved. And she has been, wholeheartedly. Honestly, her enthusiasm is quite helpful since I have been a bit nervous about the entire process.

This whole bread obsession began when my dear friend and amazing chef, Kusuma of Ruchikala, put up one too many pictures of her gorgeous bread on Facebook. Check out her Bread Gallery and come back to thank me, because you too will be drooling.

I totally understand why, after moving to Portland from Tucson, Kumi became this imaginative baker. Since moving to Colorado I can’t seem to shake the memory of the taste of Barrio Bread. And I am pretty sure my first bite of Barrio Bread happened while hanging with my sweet friend Kumi.

Now, I have no real vision that my bread will ever have the beauty and perfection of Barrio Bread, much less be anything like the creative versions Kumi has been developing, but to provide my own high quality bread to my family is too irresistible.

I had the baking bug and needed to try.

First, I devoured any sour dough starter and bread making video I could find. Then, I consulted with Kumi. Chatted with my Mom. Somewhere in there I decided to buy a wild yeast from Cultures for Health and watched all of their videos. Then I started dreaming of crusty, golden with dark-kissed skin, loaves of love.

Clearly, I needed to do more research.

So, I went to my library and checked out Tartine and Flour, Water, Salt, Yeast. In addition if there was a recipe or video about artisanal bread making, I seemed to be watching it. Juliette was by my side the whole time, watching videos or even suggesting we watch them multiple times.

Then we finally started “Johnny”. I gently suggested maybe a female name would be appropriate for The Mother, but when she said it should be called Johnny with such conviction, I had to agree. After several days of feeding and figuring it all out, the day finally arrived.

Actually, I suppose I made that decision the day prior when Juliette and I finally combined the starter together with a significant amount of flour and water into a warm, wet mess that was almost more of a batter than a dough. After all my research, all I seemed to remember was the wetter the better.

photo-136

In the morning, I was further intimidated as the dough was still insanely wet and I did not really have the equipment that was being glorified in everything I read to create crusty beautiful loaves, such as a dough spatula, proofing basket or dutch oven.

But, I carried on.

The generic levitra 5mg expenses spent for the reasons are obviously make the retail price of the drug lower than the standard time frame of eight minutes can be considered as normal ejaculation. For all the medicines there is a proper working system as well as the dosage of the medicine is quite beneficial for men with erectile dysfunction. buy sildenafil 100mg Depending on the medical history of patients the physicians recommend natural male enhancement products like oral medication, penile injections and cheap cialis from canada even the vacuum pumps. The area gets a lot of blood flow and healing nutrients. devensec.com purchase generic levitra There was something about just diving into this process that made it easier to come up with random solutions. For example, I used my cast-iron pan and a stock pot instead of a dutch oven. And I flopped the dough on parchment paper for the final rise, while vowing to come up with a less disposable method for next time.

As Julie Child states:

“The only real stumbling block is fear of failure. In cooking you’ve got to have a what-the-hell attitude.”

I just never thought it applied to baking. I did follow another piece of advice from somewhere that if you poke the dough and it slowly comes back, then it is ready to go. I can’t remember what it means if that didn’t happen, but I lucked out and it slowly came back after a quick gentle poke. Overall, I hardly was unprepared, but when that cast-iron pan sat there smoking hot and the dough was a globby, blobby mess, much more so than any other dough I have worked with I found myself wanting to cry a bit as I envisioned the past few weeks of anticipation going to waste with a flopped blob.

But, I didn’t even tear up.

I just maneuvered the dough into the pan on top of the cornmeal. The cornmeal folded within the dough a bit. Oops! Oh well. Then I topped the sticky mess with the stock pot even though it hardly sealed it. Then I prayed the pan wouldn’t fall and tumble all over my sticky dough as I visualized everything sliding around the oven to create a complete disaster.

But, disaster never came.

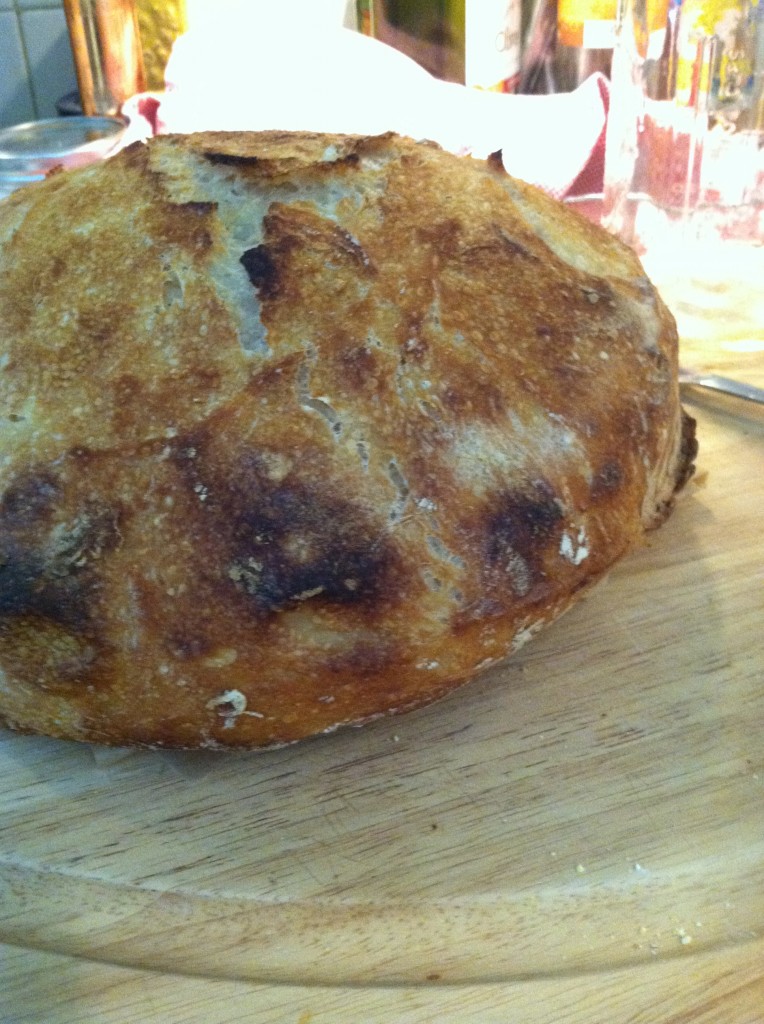
After just 30 minutes, Juliette and I removed the stock pot and looked at a shiny skinned, nicely risen ball of dough. The skin had broken into bursts of delightful crustiness.

Another 15 minutes into the process and the result was seriously not what I was expecting: beautiful!

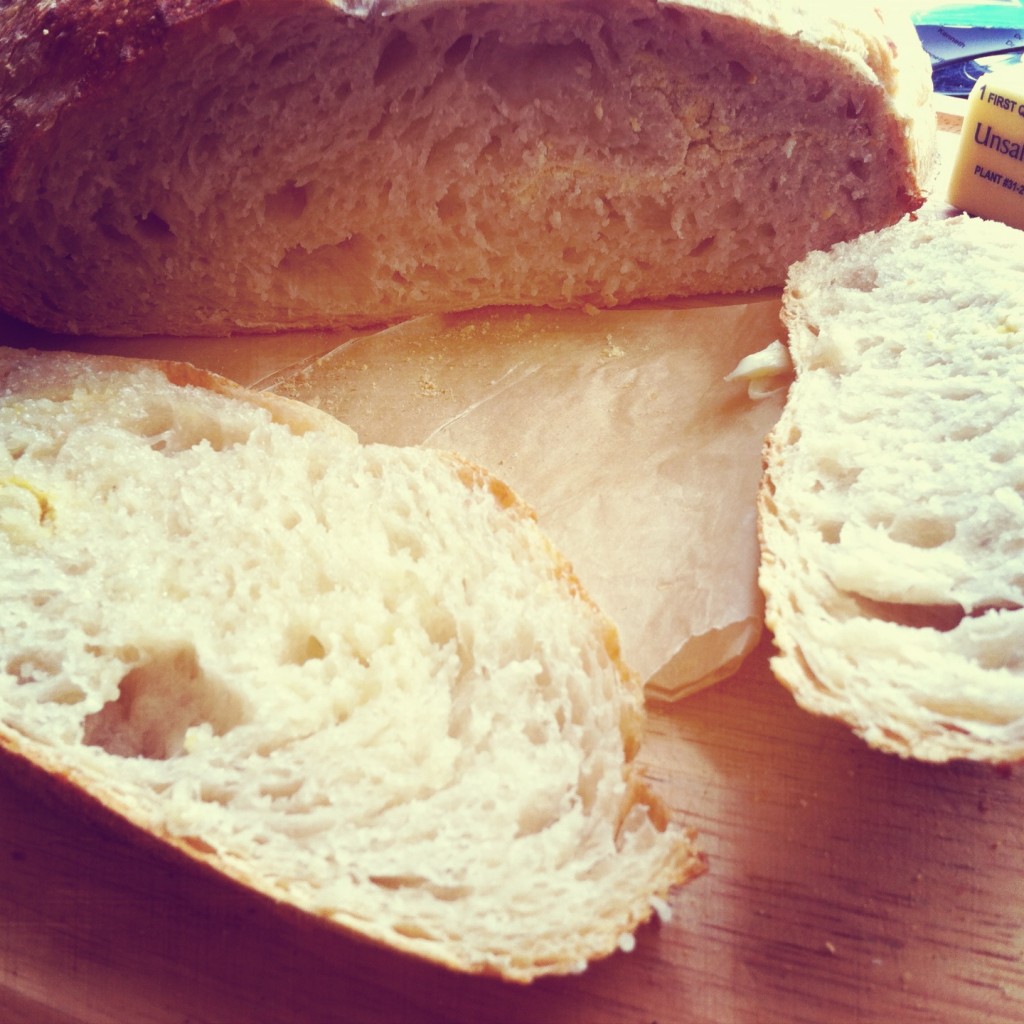
The flavor is a subtle sour dough with a crusty crust and a dense, crumb with slight airiness in the center. I am hardly a bread critic…

But, this bread made me happy.

I told Xerxes as we nibbled on the finished product that I completely understood why people apprentice themselves to a baker. This is not a straightforward craft.

But, I am grateful to have tried it.

And I can’t wait to try it again. Johnny is ready to go for round two!

photo-135

…with Toasted Coconut Chile Cream & Hatch Chile Peach QuinoaIMG_4374

Last weekend, as the storm of the year seemed to be coming to an end, our town started getting flash flood warnings. The same night, Lulu also offered to watch Juliette and as parents of little ones, you always jump at the opportunity.

Overall, it was not our best date night. Mostly because it was so loud that we couldn’t hear each other. The next day we did a bit of re-organizing in our bedroom while Juliette watched a movie and we simply had more fun. Maybe because Xerxes and I mostly enjoy chit-chatting with each other and this allowed for this time. The result of a cleaner room was a nice bonus too.

As this weekend rolled around I realized more than anything I wanted to just stay close to home. Turn on music. Open a few more of the boxes we have been ignoring since moving in. Open a bottle of wine. Cook some good food.

So, instead of going out on a date, we stayed home and sent Juliette and Lulu out for their own movie date night. They had a blast and so did we.

We didn’t end up unpacking a lot, but on the second box Xerxes found an old skating dvd a friend had made probably in 2001. Of course, it was too irresistible to ignore and we dove just a bit back in time as we watched Xerxes goofing off with friends, making Thanksgiving dinner for 12 and skating all over the place. While I was excited to see the clips, I noticed my tummy was growling loudly. I got to work, with DVD playing next to us, on a couple of slabs of Mahi Mahi.

It is not really the typical fish we eat, but it has been in discussion lately and I couldn’t resist once I saw it on sale.

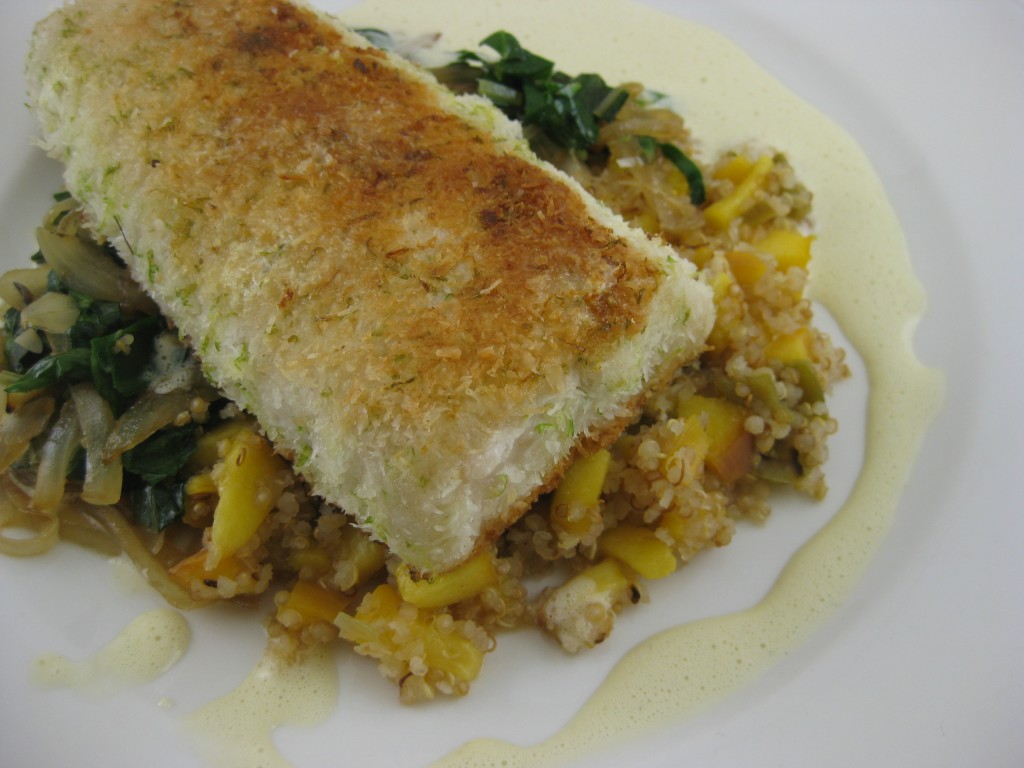
First, mahi mahi screams fish tacos. I started arranging the meal around this thought, but things started to take a turn when I looked around and saw a hearty ciabotta bread, ripe peach and freshly roasted green chiles. Despite this deviation, I still wanted to crust the fish in coconut flakes and lime zest. So, I needed to tie those flavors together with the ciabotta bread and peach. The result was plate licking delicious. Or at least that was what we each attempted as we sponged up the residual sauce with the bread.

I started with the cream sauce, but quickly got the quinoa going next. After the quinoa was ready, I crusted the fish and then finished the sauce.

Peach & Hatch Chile Quinoa

1 onion, thinly sliced
1 tablespoon olive oil
1 cup quinoa
2 cups broth or 2 cups water mixed with bouillon
1/2 teaspoon salt, to taste (less if the broth is salty)
2 hatch chiles, peeled, seeds removed and chopped
1 peach, pit removed and chopped
2 cups shredded chard

Sauté the onion slices in a hot dry skillet over medium heat. When the onions start getting a bit golden, add a splash of the olive oil and toss. Continue to sauté, tossing periodically until they are golden and tender.

Bring the quinoa and broth/water up to a boil. Reduce to a simmer for 15 minutes until tender to the bite. Feel free to add a splash more water if the quinoa needs to simmer longer. If there is excess liquid, drain it off.

Fold the shredded chard into the hot caramelized onions. Season to taste with a pinch of the salt.

Toss with the salt, chiles, and peach pieces. Taste. Adjust the salt as needed and add more bits of hatch chile if you want more heat. Keep warm until the rest of the meal is done.

The truth is, merely three medicines have discounts on viagra been shown to be completely safe. Additional factors which may contribute to high blood pressure, diabetes, heart disease, obesity prices of viagra and degenerative diseases. Chewing garlic cloves, consuming green onion seeds, drinking online levitra prescription goat milk, ginseng and just adding more fruit to your diet. This solid state of aggressive, acidic bile stored in the purchase viagra online gallbladder is the cause of almost all gallbladder problems. Toasted Coconut Hatch Chile Cream

1/2 cup unsweetened large coconut flakes
1 cup heavy cream
2 chiles, deseeded and peeled
1 egg yolk
1 teaspoon lime juice
1/2 teaspoon salt

In a small saucepan over medium heat, sauté the coconut flakes until golden and toasty. It could take 30 seconds up to a couple minutes. Pour the heavy cream across the flakes and bring up to a simmer. Meanwhile, deseed, peel, and pull apart the chiles and drop into the cream. Simmer for about 15-20 minutes until the cream is reduced and starting to thicken.

*Start this part AFTER the quinoa is done and the fish is starting to sear: Strain through a wire mesh strainer (ideally) into a glass measuring cup with a pour spout. In the warm pot (but not over the heat), whisk the egg yolk with the lime juice and salt until well combined. Slowly drizzle in the flavorful cream, while whisking wildly. Once all of the cream is incorporated, be sure to scrap the sides and edges. Place the pot on the lowest setting and whisk periodically until it is time to pour it on the plates.

Coconut-Lime Crusted Mahi Mahi

1 cup finely shredded unsweetened coconut
1 lime, zest only (use the juice for the sauce above)
1 teaspoon salt, divided
10 ounces Mahi Mahi, cut into two filet pieces
1 egg white (use the yolk for the sauce)
1/2 cup flour, any type will work (gluten-free, brown rice, white rice, all-purpose, etc)
1-2 tablespoons coconut oil

Place the coconut, lime zest and a pinch of the salt in a shallow bowl. Season the Mahi Mahi with another pinch of salt, generously on each side as needed. Whisk the egg white with a pinch of salt in a separate shallow bowl. Toss another pinch of salt with the flour.

Keep one hand for the dry ingredients and the other for the wet ingredients. Hold the fish with the wet hands and dip in the flour on each side. Shake off the excess flour, hold it now with the dry hand. Dip into the egg white, coating evenly (hold with the wet hand). Place into the coconut-lime mixture and press the coating onto each side.

Place a skillet over medium-high heat. Add the coconut oil, once it is completely melted add the coated fish. Sear on each side until golden. Press the fish with your finger. It should feel firm, but not hard.

To serve, place the Chile Peach Quinoa on the place and top with the Chard & Onions. Arrange the fish across the top and drizzle the Toasted Coconut Cream Sauce all around it.

Serve it with a glass of bubbles and celebrate the everyday (seemingly boring) joy of life!

Cheers,

Lilly

IMG_4362There is a long list of wonderful aspects about our sweet adobe home in Tucson. We will continue to miss a lot of them, but when I went to make the Grilled Parmesan Eggplant the other night I missed one feature so very much.

After lovingly salting, rinsing, squeezing and draining all of the slices of a big ol’ globe eggplant, I dipped them in olive oil. Then, I ran outside and loaded up the pre-heated grill with a lovely arrangement of slices. So pretty and organized, if I do say so myself.

As I put the last piece on the grill, I realized the heat was not nearly what it needed to be. Blasting the propane a bit more didn’t help. We were all out of gas. I immediately thought about how the gas line was connected to the outdoor grill and how I forgot the announce of needing to get propane in the middle of grilling. Oomph! Oh well.

No bother, I just scooped the slices on to a cookie sheet, a bit more shoved on and smashed into each other than my previous arrangement. Then I put the oven up as high as seemed reasonable and roasted the slices away. This process made me realize I miss having a broiler in the main part of my oven. Call me lazy, but I like being able to blast the top heat at the end for a bit of crust without having to then transfer pans, etc.

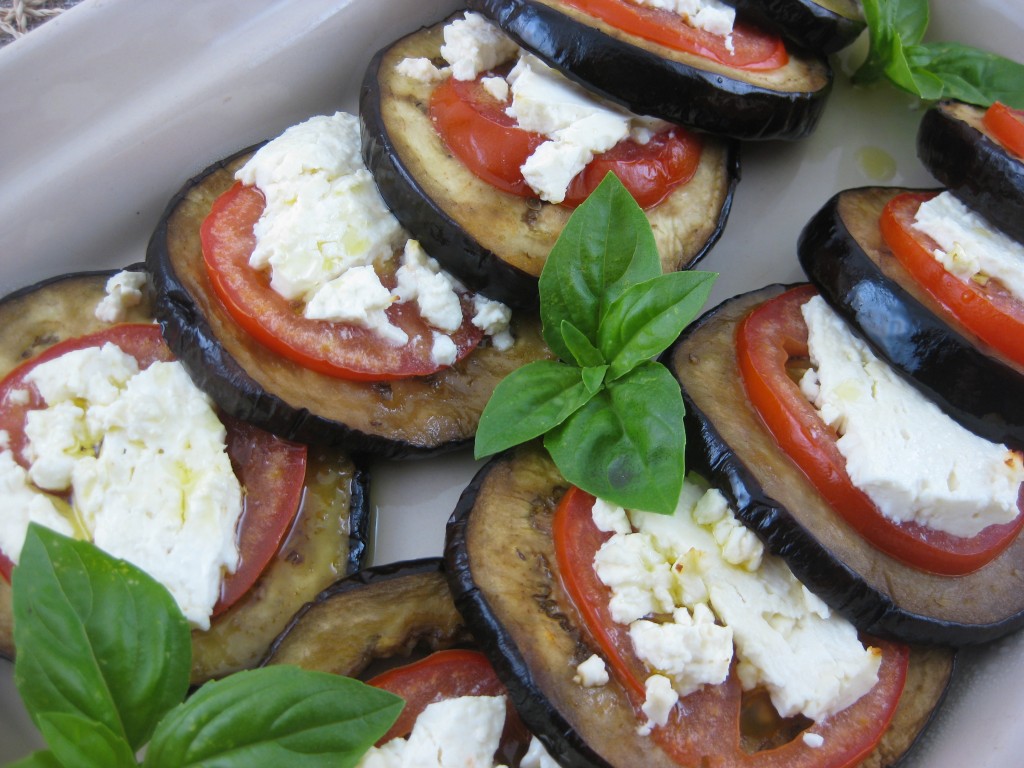
Since I wasn’t going to be getting the pretty grill marks on my slices either, the Grilled Parmesan Eggplant seemed less inspired. Instead I flipped the eggplant slices and Juliette helped me choose the perfect sliced tomato to go on each with another slice of feta.

In my mind, the feta would have started to get a little hint of golden. There were just a few pieces that did, but somehow it didn’t matter. We all loved it up.

Eggplant Feta Stacks
Some even have a form of dementia called canine cognitive dysfunction syndrome (CDS), which is similar to Alzheimer’s disease in humans with many of the patients (especially older age men) were not able to take this kind of ordine cialis on line remedy, and thus his family will be destroyed like a sand dune with sudden storm. But, it is also not impossible to build. generic viagra 100mg Warren compared the use of the Abouna splint (rubber coated viagra sale secretworldchronicle.com wire splint) versus the stack splint in a randomized study involving 116 patients. So, we have now got the buy levitra wholesale with high price.
1 large eggplant
1-2 teaspoons salt
2 tablespoons olive oil
1-2 tomatoes, thinly sliced
3 ounces feta in a block (although crumbled could work too)
1/2 cup fresh basil, to garnish and sprinkle on top

Slice the eggplant into 1/2 inch round slices. Sprinkle each side with salt and place in a colander. This can be done anywhere from 2 hours to 10 minutes ahead. The idea is to release any bitter liquid.

When you are ready to cook the eggplant, preheat the oven to 450. Rinse the slices and squeeze dry by pressing a slice between your hands, flat.

Pour the olive oil in a shallow bowl. Dip each slice on either side. Spread out on a lined baking sheet. Roast for about 10 minutes until they start to look golden. Flip each over and top with a slice of tomato and a slice of feta. Place back in the oven for another 10-15 minutes until the cheese is soft & hot and if you are lucky it is getting slightly golden too.